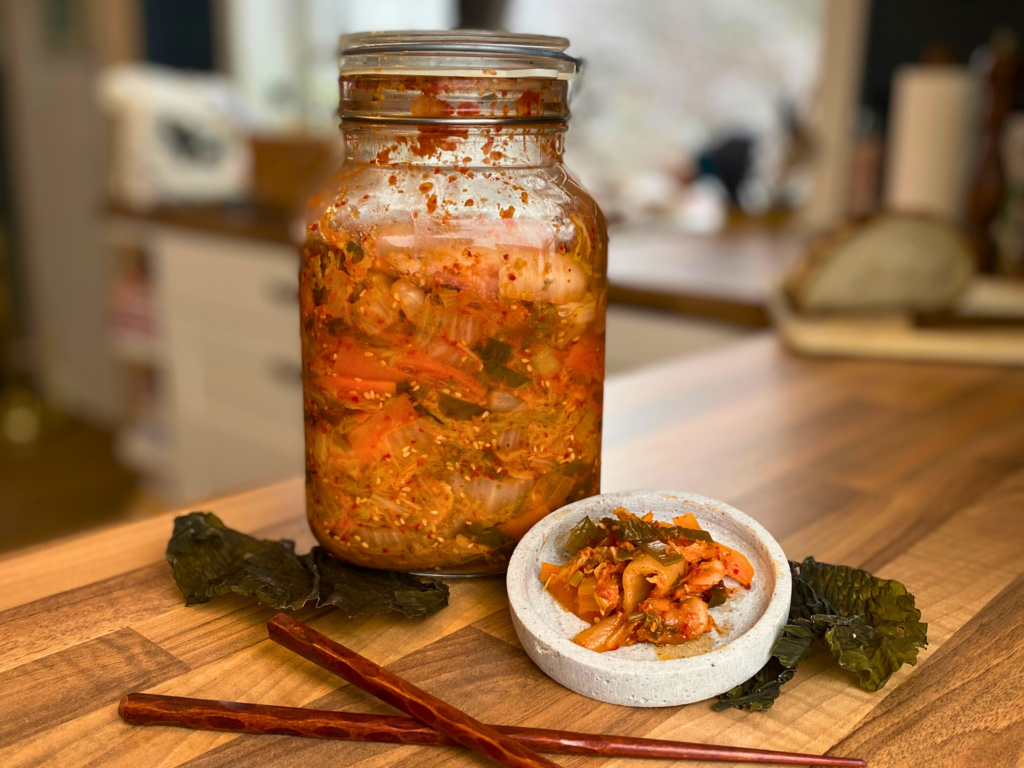
Kimchi with sugar kelp
Kimchi is a Korean dish that has taken the world by storm! By harnessing the process of lacto-fermentation (sounds complicated – it’s not!) you can turn plain vegetables into delicious, tangy, spicy kimchi. Not only does it taste amazing, but it’s full of friendly bacteria that promote great gut health. The best part is that the amazing flavour is created by those bacteria – you just have to set up the right environment for them to thrive, then sit back and relax! These bacteria fall under the family of lactic acid bacteria, and they do best in anaerobic (no oxygen) environments with 2% salt. The amounts of vegetables given here are just a guide – as long as you have a 2% salt ratio, you can make as much kimchi as you like! Make sure you calculate that based on the weight of the veggies, and not the bowl itself. A good way of doing this is by weighing the empty bowl first, then weighing it when it’s full of vegetables, then subtracting the initial bowl weight. Most Asian stores will sell kimchi paste, but you can make your own by blending fresh ginger, garlic, shallots, soy sauce, and Korean red pepper flakes (gochugaru) to a smooth paste.
Ingredients:
1kg Chinese cabbage, roughly chopped into 2cm strips, base reserved
150g daikon or radishes, thinly sliced into batons
150g carrots, thinly sliced into batons
100g spring onions, roughly chopped
25g coriander, roughly chopped
100g sugar kelp, soaked in cold water overnight then cut into ribbons
150g kimchi paste (store bought or homemade)
30g fine sea salt
2 tbsp fish sauce (optional)
2 tbsp sesame seeds (optional)
1 tsp gochujang paste (optional)
Directions:
1)
Combine all the vegetables and sugar kelp in a bowl with the salt. Massage for five minutes with clean hands, making sure the salt gets into every crevice. Cover with a clean tea towel and leave to stand for at least two hours. The salt will draw out the liquid from the vegetables, which not only gives them a better texture, but also will help to create the anaerobic environment that the bacteria need to work.
2)
Add the kimchi paste to the vegetables, and massage well for another five minutes. Don’t be afraid to use some force – you should really scrunch the vegetables up so the kimchi paste gets everywhere. The more juicy the mix becomes, the better!
3)
Add extras to taste. Fish sauce is a popular choice as it gives the kimchi a funky flavour, sesame seeds give additional texture, and gochujang paste gives it a kick, for those who like it spicy.
4)
Massage again for another five minutes. There should now be plenty of liquid surrounding your veggies.
5)
Time to transfer the mixture to a sterilised 1L swing top jar. Using a large spoon, transfer the mix into the jar and press down firmly. You want to press the mixture down well to ensure that there are no trapped air bubbles, as this can hinder the activity of the bacteria.
6)
Keep transferring and pressing until the jar is almost full, with about 2 inches of space left at the top. If you have excess kimchi, move on to another jar. The kimchi will expand during the fermentation process, so it needs some room to grow in the jar.
7)
Take the reserved base of the cabbage from before, trim it to fit the mouth of the jar if necessary, and push it down hard on the kimchi. You should see all the liquid oozing up around the side of the cabbage. The kimchi mixture should be fully submerged in the liquid, which acts as a natural oxygen barrier.
8)
Close the jar and let it stand at room temperature for approximately one week, until the desired sourness has been achieved. You can start taste-testing it after five days (using a clean fork for every taste) and once you’re happy with the flavour, pop the jar into the fridge to stop the fermentation process. Let stand for a further three days in the fridge to allow the flavours to develop.
9)
N.B. During the fermentation process, you should start to notice bubbles of air in the kimchi mix – this means it’s working! The bacteria produce carbon dioxide gas as part of the process. As the gas builds up, it will force its way out of the jar’s seal (you can carefully vent or ‘burp’ the jar yourself periodically, but it’s not necessary). You will probably hear the jar fizzing and hissing as it does its thing – this is totally normal and the sign of lively and healthy bacteria. Some of the liquid in the jar may also be pushed up and forced out of the jar’s neck, so it’s a good idea to stand the jar in a tray or bowl to catch any excess juices.